
Painting kitchen cabinets can transform a dated kitchen for a fraction of the cost of a full remodel, typically $300-$800 in materials versus $8,000-$20,000 for new cabinets. It’s a high-impact project that delivers professional results if you follow the right process. The catch? Success depends almost entirely on preparation and paint selection, not artistic skill. Rushing through surface prep or using the wrong primer will lead to chipping and peeling within months, no matter how carefully the topcoat is applied. This guide walks through the complete process, from assessing whether your cabinets are worth painting to achieving a durable, factory-like finish.
Key Takeaways
- Painting kitchen cabinets costs $300–$800 compared to $8,000–$20,000 for replacement, delivering a complete kitchen transformation in 3–5 days of active work instead of weeks of disruption.
- Thorough preparation—including degreasing, sanding, and primer application—accounts for 90% of the outcome; skipping these steps leads to chipping and peeling within months.
- Waterborne alkyd hybrid enamels like Benjamin Moore Advance offer the self-leveling durability of oil-based paint with low odor and easy cleanup, making them the top choice for most DIYers.
- Use a 4-inch high-density foam roller on flat surfaces or an HVLP sprayer for a factory-smooth finish; apply two thin topcoats over bonding primer rather than one thick coat.
- Wait 24–72 hours after your final coat before reassembling doors and cabinets, and allow 7–21 days for full cure before heavy use to ensure a durable finish lasting 5–10 years.
- Semi-gloss or satin sheens in white, gray, or trending colors like navy and sage green provide the best moisture resistance and contemporary appearance for kitchen cabinets.
Why Paint Your Kitchen Cabinets Instead of Replacing Them?
Cabinet replacement involves demolition, plumbing/electrical adjustments, and weeks of disruption. Painting takes 3-5 days of active work spread over a week or two, depending on drying times. The cabinet boxes and frames remain functional: only the finish changes.
Not all cabinets are good candidates. Solid wood, plywood, or MDF cabinets take paint well. Thermofoil or laminate cabinets with peeling, bubbling, or edge damage should be replaced, paint won’t adhere reliably to compromised laminate, and any lifting will only worsen. If drawer boxes are falling apart or door hinges are stripped out, painting becomes a cosmetic fix on failing structure.
Cabinets in good structural condition but with outdated finishes, think honey oak, pickled wood, or worn white melamine, are ideal. Painting also allows for hardware updates, which modernize the look further. For most homeowners, the return on investment is immediate: a fresh, cohesive kitchen without the cost or timeline of a gut renovation.
Essential Tools and Materials for Cabinet Painting
Having the right tools prevents frustration mid-project. Here’s what’s needed:
Materials:
- Degreasing cleaner (TSP substitute or dedicated cabinet cleaner)
- Bonding primer (shellac-based like BIN or oil-based for stained wood)
- Paint (see section on types)
- Sandpaper (120-grit and 220-grit)
- Wood filler (for dents or holes)
- Painter’s tape and drop cloths
- Tack cloth or microfiber rags
Tools:
- Cordless drill/driver with bits matching your hinge screws
- Paint sprayer (HVLP or airless), foam roller, or quality synthetic brush (2-2.5 inches)
- Paint tray and liners
- Sanding block or random orbital sander (a sander speeds prep significantly)
- Sawhorses or a painting rack for drying doors flat
- Labeling system (painter’s tape and marker)
Safety gear:
- Respirator mask (especially if spraying or using oil-based products)
- Safety goggles
- Nitrile gloves
- Ventilation fan if working indoors
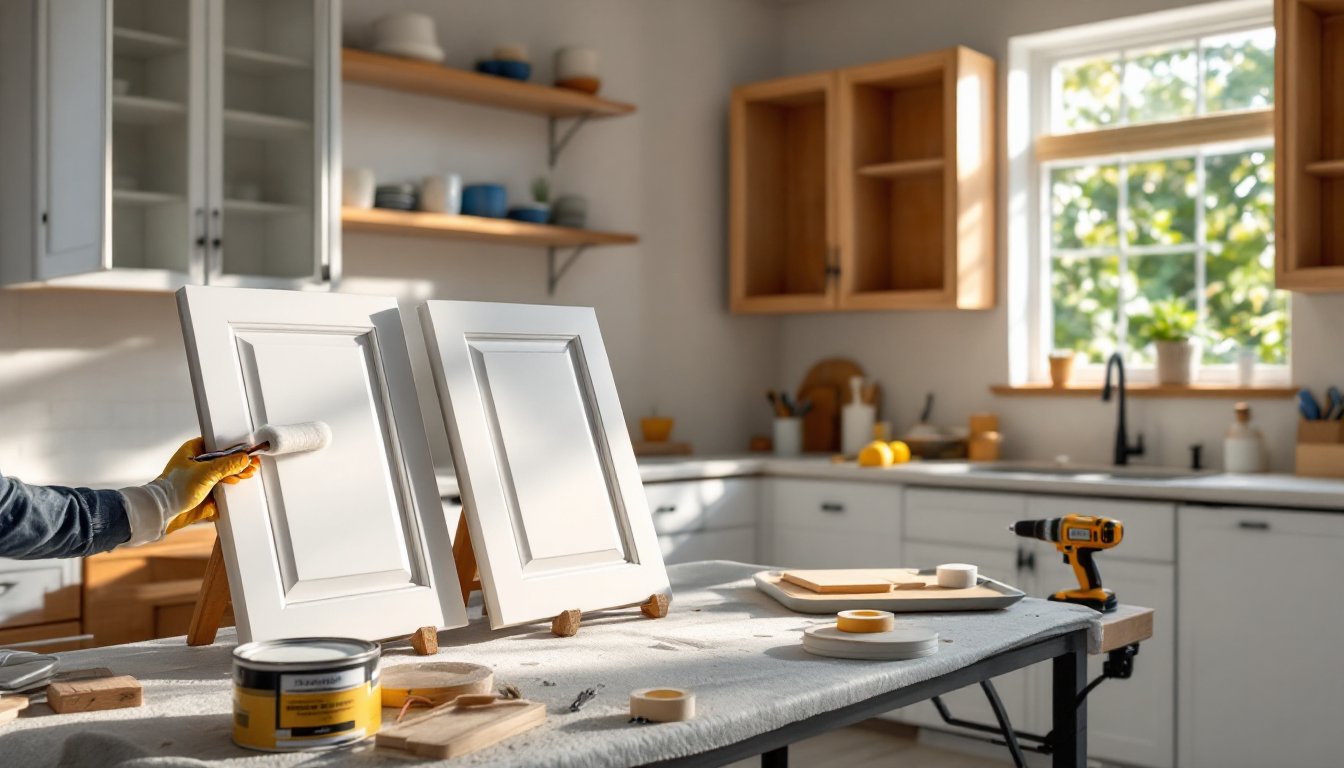
A paint sprayer delivers the smoothest finish but requires practice and thorough masking. A foam roller (4-inch, high-density) gives excellent results on flat surfaces with minimal texture, it’s the middle ground most DIYers choose. Brushes work for detailed areas and touch-ups but can leave visible strokes on large door panels unless using a very fine-bristle brush and thinned paint.
Step-by-Step Preparation: The Key to a Long-Lasting Finish
Preparation accounts for 70% of the work and 90% of the outcome. Skipping steps here will show within the first year.
1. Remove all doors, drawers, and hardware.
Label each door and its corresponding hinge location with painter’s tape and a numbering system (e.g., “Upper left 1”). Remove hinges, knobs, and pulls. Store screws in labeled bags.
2. Clean everything thoroughly.
Kitchen cabinets accumulate grease, cooking oils, and grime that block paint adhesion. Scrub all surfaces with a degreasing cleaner (TSP or a phosphate-free substitute). Rinse with clean water and let dry completely. This step is non-negotiable.
3. Fill imperfections.
Use wood filler for dents, scratches, or old hardware holes. Apply with a putty knife, let dry per manufacturer instructions (usually 30-60 minutes), then sand flush.
4. Sand all surfaces.
Sand cabinet frames, doors, and drawer fronts with 120-grit sandpaper to degloss the existing finish and create a mechanical bond for primer. You’re not stripping to bare wood, just scuffing the surface. Follow with 220-grit for a smooth base. Wipe down with a tack cloth to remove all dust.
5. Prime with a bonding primer.
Primer is the foundation. For previously stained or dark wood, use a shellac-based primer like BIN to block tannin bleed-through. For painted cabinets or raw MDF, a high-quality oil-based or waterborne bonding primer works well. Apply a thin, even coat: thick primer sags and creates texture. Let dry fully (check can instructions, often 1-3 hours for recoat).
6. Sand the primer.
Once dry, lightly sand primed surfaces with 220-grit sandpaper. This knocks down any raised grain or dust nibs and ensures the topcoat lays glass-smooth. Wipe clean with tack cloth again.
Most cabinet painting failures trace back to inadequate cleaning or skipping the primer sanding step. These aren’t optional shortcuts, they’re structural necessities.
Choosing the Right Paint and Color for Your Kitchen
Best Paint Types for Kitchen Cabinets
Kitchen cabinets endure constant handling, moisture, grease splatter, and cleaning. The paint needs to be hard, durable, and scrubbable.
Alkyd (oil-based) enamel: The gold standard for durability. Self-levels beautifully, leaving minimal brush or roller marks, and cures to a rock-hard finish. Downside: strong odor, requires mineral spirits for cleanup, and takes 16-24 hours between coats. Needs excellent ventilation. If durability is the priority and the workspace allows, alkyd wins.
Waterborne alkyd (hybrid enamel): Combines the self-leveling and hardness of oil-based paint with the low odor and soap-and-water cleanup of latex. Examples include Benjamin Moore Advance and Sherwin-Williams Emerald Urethane Trim Enamel. These have become the go-to for most DIYers and pros, nearly the performance of traditional alkyd without the fumes. Cure time is still 7-14 days for full hardness.
100% acrylic latex (cabinet-specific formulas): Faster drying, easier application, but less durable than alkyd or hybrid options. Suitable for low-traffic cabinets or secondary spaces. Not recommended for heavily used kitchens unless it’s a premium cabinet-specific formula.
Finish sheen: Semi-gloss or satin. Semi-gloss is more scrubbable and resists moisture better, ideal for kitchens. Satin hides imperfections slightly better and offers a more contemporary, less reflective look. Flat and eggshell finishes won’t hold up to repeated cleaning.
Color selection: White, off-white, and gray dominate kitchen cabinet trends in 2026, but color is returning, navy, sage green, and charcoal are popular for islands or lower cabinets. Light colors show less wear and brighten small kitchens: darker hues add drama but require more meticulous prep since every flaw telegraphs through. Test colors with sample boards in your kitchen’s lighting before committing, cabinet paint isn’t cheap, and color regret is expensive.
Applying Paint: Techniques for a Professional Look
Application technique separates DIY from professional results.
Spraying: If using an HVLP or airless sprayer, practice on scrap wood first. Thin paint per manufacturer specs (usually 10% for latex). Hold the gun 6-10 inches from the surface, overlap passes by 50%, and keep the gun moving to avoid runs. Spraying requires masking all non-paint areas and working in a well-ventilated, dust-free space. Result: factory-smooth finish. Many budget home makeovers achieve professional results with this method.
Rolling: Use a 4-inch high-density foam roller for door panels and flat surfaces. Roll in one direction first, then cross-roll to level the finish. Work quickly, waterborne alkyds start to set within minutes. For door frames and edges, use a 2-inch synthetic brush and “tip off” (lightly drag the brush in one direction after application to minimize stipple). Rolling is slower than spraying but far easier for beginners.
Brushing: Reserve brushes for detailed areas, routed edges, or touch-ups. A quality 2.5-inch angled sash brush with fine synthetic bristles works best. Load the brush lightly and use long, smooth strokes. Don’t overwork the paint, each pass starts to pull and create texture once the paint begins tacking up.
Number of coats: Two thin topcoats over primer is standard. Thin coats dry faster, level better, and build less texture than one thick coat. Wait the full recoat time listed on the can (usually 1-4 hours for waterborne alkyds, longer for oil-based).
Application order: Paint all cabinet frames first (still installed), then doors and drawer fronts laid flat on sawhorses. Painting horizontal prevents runs and sags. Start with the back of doors, let dry, flip, then paint fronts. Many DIY furniture projects follow this same horizontal painting approach for best results.
Temperature and humidity: Paint when ambient temperature is 50-85°F and humidity is below 70%. High humidity slows cure times and can cause blushing (milky haze) in waterborne finishes.
Drying, Reassembly, and Finishing Touches
Drying vs. curing: Paint may be dry to the touch in hours, but full cure, when it reaches maximum hardness, takes 7-21 days depending on the product. Handle painted surfaces gently during this window.
Reassembly timing: Wait at least 24-48 hours after the final coat before rehanging doors, and ideally 72 hours before placing items inside cabinets. Premature reassembly can lead to paint sticking to itself (blocking) or marring.
Installing hardware: If reusing old hardware, clean it thoroughly or spray-paint it for a cohesive look. New hardware is an inexpensive upgrade that enhances the transformation. Use a hardware template or jig to ensure consistent placement, misaligned knobs scream DIY in the worst way. For painting tutorials that include hardware refresh, consistent placement is always emphasized.
Final inspection: Check for drips, sags, or missed spots before reinstalling. Touch up with a small artist’s brush if needed. Once doors are rehung, adjust hinges so doors sit flush and aligned.
Break-in period: Avoid scrubbing or heavy use for the first two weeks. After full cure, cabinets can be cleaned with mild dish soap and water. Avoid abrasive cleaners or scouring pads, which will dull the finish over time.
Painted cabinets, when done right, should last 5-10 years before needing a refresh, longer if they’re treated gently. The difference between a one-year failure and a decade of durability comes down to prep, primer, and patience during cure time.