
Laminate cabinets get a bad rap, but they’re sturdy, stable, and, most importantly, paintable. If your kitchen feels dated but your budget can’t stomach a full remodel, painting laminate cabinets is one of the most cost-effective transformations you can pull off in a weekend or two. Unlike wood cabinets, laminate has a slick, non-porous surface that won’t take paint well without the right prep work. Skip a step, and you’ll end up with peeling, chipping paint within months. But follow the process correctly, and you’ll get a durable, professional-looking finish that holds up to daily use.
Key Takeaways
- Painting laminate kitchen cabinets costs just $200–$500 in materials compared to $4,000–$15,000 for replacement, making it an ideal budget-friendly kitchen update.
- Proper surface preparation—including degreasing, sanding with 150–220 grit paper, and applying bonding primer—accounts for 80% of success and prevents peeling or chipping.
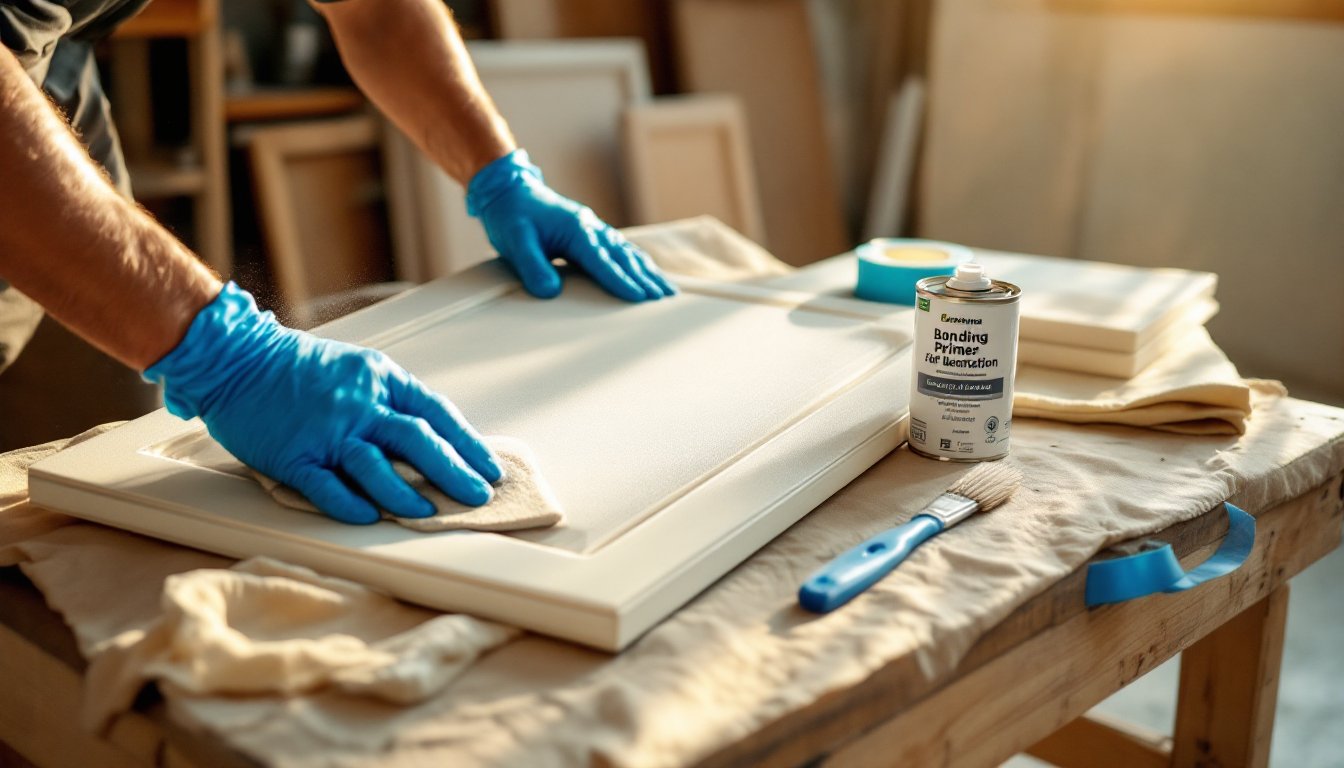
- Always use bonding primer specifically designed for glossy or laminate surfaces, such as Zinsser B-I-N or Kilz Adhesion, as regular primer won’t adhere to the slick laminate finish.
- Apply thin, even coats of cabinet-grade paint (acrylic or alkyd enamel) with adequate drying time between coats; most projects require 2–3 coats for a durable, professional look.
- Patience during the curing phase is critical—avoid heavy use for at least 72 hours and allow up to a week for complete hardening to ensure the finish holds up to daily kitchen demands.
- Painting laminate cabinets lets you control the timeline and keep your kitchen functional, unlike full replacement which requires days of disruption and coordination with installers.
Why Paint Laminate Cabinets Instead of Replacing Them
Cabinet replacement isn’t cheap. A mid-range kitchen reface runs $4,000–$10,000, and full replacement can easily hit $15,000 or more depending on materials, size, and labor. Painting laminate cabinets costs a fraction of that, usually $200–$500 in materials if you DIY, plus your time.
Laminate itself is a durable material. It’s a thin layer of plastic bonded to particleboard or MDF, designed to resist moisture and wear. The boxes are often in excellent structural shape even when the finish looks tired. If your cabinet frames, hinges, and doors are solid and the layout works for your household, there’s no functional reason to rip them out.
Painting also lets you control the timeline and mess. Cabinet replacement means days without a functioning kitchen, dust everywhere, and coordinating with installers. Painting happens in stages, you can work around your schedule, and the kitchen stays mostly usable if you tackle a few doors at a time.
That said, painting won’t fix warped doors, broken hinges, or a layout that doesn’t work. If your cabinets are falling apart or you need more storage, replacement makes more sense. But for cosmetic updates, paint delivers serious return on effort.
Materials and Tools You’ll Need
Gather everything before you start. Running to the hardware store mid-project with primer on your hands is no fun.
Materials:
- Deglosser or TSP cleaner: Removes grease and creates a paintable surface. Krud Kutter or TSP (trisodium phosphate) both work well.
- Fine-grit sandpaper: 150–220 grit for scuffing laminate without gouging it.
- Bonding primer: This is non-negotiable. Regular primer won’t stick. Look for products labeled for laminate, melamine, or glossy surfaces, Zinsser B-I-N, Kilz Adhesion, or Stix are reliable choices.
- Cabinet paint: Use acrylic or alkyd enamel, not latex wall paint. Benjamin Moore Advance and Sherwin-Williams ProClassic are popular, but any cabinet-grade paint will work if it’s designed for durability.
- Paint conditioner (optional): Floetrol or similar products help level brush strokes and extend working time in warm weather.
- Tack cloth: Removes dust after sanding.
Tools:
- Screwdriver (for removing hardware and doors)
- Painter’s tape and plastic sheeting
- High-quality synthetic brushes (1.5″–2.5″) or a foam roller for flat surfaces
- Small foam rollers work well for door panels: a brush is better for edges and trim details
- Optional: HVLP sprayer if you want a factory-smooth finish, though it requires more setup and ventilation
Safety gear:
- Nitrile gloves (degreaser and primer are harsh on skin)
- Safety goggles (especially if spraying)
- Respirator mask rated for VOCs if using solvent-based primers indoors
- Drop cloths to protect countertops and floors
Don’t cheap out on primer or paint. Bargain products don’t bond as well and won’t hold up to the humidity, grease, and repeated cleaning a kitchen demands.
Step-by-Step: Preparing Laminate Cabinets for Paint
Prep accounts for 80% of the outcome. Rush it, and the paint won’t stick. Many DIYers who’ve tackled painting tutorials emphasize that surface prep separates amateur jobs from professional-looking results.
Cleaning and Degreasing
Start by emptying the cabinets. Remove all doors, drawers, and hardware. Label each door with painter’s tape and a number so you know where it goes back, cabinet openings aren’t always perfectly square, and doors often fit best in their original spots.
Clean every surface with a deglosser or TSP solution. Kitchen cabinets accumulate a stubborn film of cooking grease, even if they look clean. Spray or wipe deglosser on all surfaces, let it sit for the time specified on the label (usually 5–10 minutes), then wipe with a clean, damp cloth. Don’t skip the cabinet frames, edges, or the tops of upper cabinets.
Let everything dry completely, at least an hour, longer if your kitchen is humid.
Sanding and Priming
Laminate is too smooth for paint to grip without mechanical abrasion. Lightly sand all surfaces with 150–220 grit sandpaper. You’re not trying to remove the laminate or create deep scratches, just scuff the surface enough to give the primer something to bite into. The laminate should look slightly duller and feel less slick.
Wipe everything down with a tack cloth to remove sanding dust. Any dust left behind will create a gritty finish.
Apply bonding primer to all surfaces. Use thin, even coats, don’t glob it on. A foam roller works well for flat door panels and cabinet sides: a brush handles detailed edges and frame parts better. If you’re brushing, work in long, smooth strokes in the direction of the grain (or the long dimension of the door). Primer dries quickly, so don’t overwork it.
Let the primer dry according to the label, usually 1–2 hours for a recoat, 24 hours for full cure. Some people apply a second coat of primer for extra adhesion, especially on high-traffic doors. Lightly sand the primed surface with 220-grit paper between coats if you see any brush marks or roughness, then wipe with a tack cloth again.
Applying Paint for a Professional Finish
Once the primer is fully cured, you’re ready for paint. Work in a well-ventilated area, garages, basements, or even outdoors work if the weather cooperates. Avoid painting in direct sunlight or when it’s too humid (above 70% relative humidity), as it affects drying and leveling.
Stir the paint thoroughly. If you’re brushing or rolling, consider adding a paint conditioner like Floetrol (10% by volume) to help the paint flow and self-level, reducing visible brush strokes. This is especially helpful if you’re working in warm, dry conditions where paint dries too fast.
Apply the first coat of paint with the same tools you used for primer. Use thin coats, this is critical. Thick coats look good wet but sag, drip, and take forever to cure. Thin coats dry faster, level better, and build up to a more durable finish. For doors, paint in this order: edges first, then the panel (if it’s a raised or recessed panel door), then the frame parts (rails and stiles). Always finish your strokes in the direction of the longest dimension.
Allow the first coat to dry fully. Check the paint can for recoat times, most cabinet paints need at least 4–6 hours between coats, sometimes longer. Don’t rush it. If the paint still feels tacky, wait.
Lightly sand between coats with 220-grit paper if you see brush marks, dust nibs, or rough spots. Wipe clean with a tack cloth. Apply a second coat of paint using the same technique. Two coats are usually enough, but high-traffic areas or dramatic color changes (like white over dark laminate) may need a third.
Homeowners who’ve documented room makeovers often point out that patience during the curing phase makes a huge difference. Cabinet paint needs time to harden fully, some formulas take up to a week to cure completely, even if they’re dry to the touch after a few hours. Avoid putting heavy items back on shelves or slamming doors for at least 72 hours.
If you’re using a sprayer, thin the paint per the manufacturer’s recommendations (usually 10–15% water for water-based paints). Practice on cardboard first. Hold the gun 8–10 inches from the surface and move in smooth, overlapping passes. Spraying gives the smoothest finish but requires good ventilation, masking off surrounding areas, and cleaning the equipment thoroughly afterward.
Once the final coat is fully cured, reattach hardware or install new pulls and knobs. New hardware is an inexpensive upgrade that amplifies the transformation. Consider soft-close hinges if your old ones are noisy or worn, they’re widely available and easy to install.
Protect your new finish by using cabinet liners inside and wiping spills promptly. Avoid abrasive cleaners. A damp cloth with mild dish soap is usually all you need. For inspiration on other painting tutorials and budget-friendly updates, many DIYers share detailed walkthroughs and lessons learned from their own projects.
Conclusion
Painting laminate cabinets isn’t a quick Saturday project, but it’s one of the highest-impact upgrades you can do for the cost. The keys are proper surface prep, bonding primer, quality paint, and patience during the curing process. If you take your time and don’t skip steps, you’ll end up with a finish that holds up to real kitchen use for years.